Blog

Hug Your Home Challenge – March Tips

Two months down and only ten to go in The Property Geeks 2018 Hug Your Home Challenge. We’re working our way through a year full of home maintenance tips and tricks. If you haven’t signed up, there’s still plenty of time. Join in here!

If you’ve been keeping up, it’s time to tackle March’s list right now. We’ve got a few tips and tricks to take on those tasks. Let’s get started with one of our least favorite jobs… cleaning out the oven!

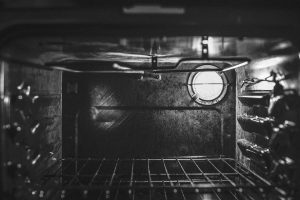
“Give Your Oven Some Lovin'”

Do you know anyone who loves to clean their oven? Sure, they enjoy it once it’s clean, but does anyone ever look forward to scraping the baked on goo and grime off the bottom of their oven? If you know of someone, send them our way! For the rest of you, this is one chore where the anticipation is actually worse than going through the motions. Follow these steps and your oven will sparkle with minimal effort:

Oven

  1. Fill your bathtub or a large basin with warm water and a scoop of dishwasher detergent. (If you’re using your bathtub, you may want to put an old towel down first so it doesn’t get scratched.)
  2. Remove your oven racks from the oven and let them soak for several hours in the tub.
  3. Make a paste with baking soda and water.
  4. Spread the paste over the inside of your oven with a nylon scrubber or sponge.
  5. Let it sit for several hours or overnight.
  6. Wipe off the dried paste with a wet sponge.
  7. Scrub the oven racks, rinse and let dry before returning them to the oven.


“Return the Spring to Your Shower”

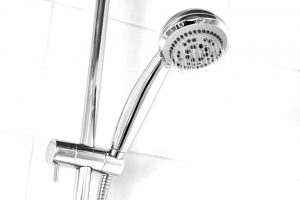
Even if you don’t have hard water, mineral deposits and sediment can build up on your shower head. Your water pressure can be affected and you might even see a rogue stream of water shooting off in a random direction. Never fear. Cleaning off your shower head is super easy and you probably already have everything on hand.

  1. Fill a plastic bag with white vinegar.
  2. Slip the bag over your shower head, making sure it’s submerged in the vinegar, and secure in place with a rubber band or tape. (Make sure you don’t get tape on the metal.)
  3. Leave in place overnight.
  4. Remove the bag and scrub around the shower head, especially the holes, with an old toothbrush.
  5. Run clear water to rinse and ta-da — you’ve got a sparkly, free-flowing shower!

“Clean Up Those Coils”

Refrigerator

Your refrigerator is probably one of the hardest working appliances in your home. It doesn’t require much maintenance, but if you can remember to dust or vacuum the coils every so often, it will improve the efficiency of this much-loved appliance. The first step to cleaning up those coils is to figure out where they are. Typically, coils are located in a massive grid on the back of the refrigerator. If that’s the case with your model, simply unplug it from the wall then gently vacuum or dust any build-up from the coils. Some models may have the coils on the bottom. Again, unplug your appliance from the wall then look for either a plate in front of the refrigerator or one in back. Remove the cover and carefully dust or vacuum the coils. Once your refrigerator is dust-free you can plug it back in and pat yourself on the back for crossing another home maintenance task off your list.

Be sure to join us on our Facebook page where we’ll share other tips and tricks for tackling your home maintenance tasks! Until next time, keep hugging your home!

0
0
Meatballs

Keya Cooks – Cheesy Garlic Bread Meatball Sliders!

Property Geek Nekeya Broadnax took her turn in the kitchen and searched high and low for a recipe to share! When she came across this post from The Comfort of Cooking, she was inspired to try out these delicious Cheesy Garlic Bread Meatball Sliders!

The original recipe and post can be found here: http://www.thecomfortofcooking.com/2016/05/cheesy-garlic-bread-meatball-sliders.html

Meatballs

Cheesy Garlic Bread Meatball Sliders

Ingredients:

Sliders:

  • 1 lb. ground beef
  • 1 large egg
  • 1 tsp kosher salt
  • 1/4 tsp black pepper
  • 1 Tbsp garlic powder
  • 1/4 cup grated parmesan cheese
  • 2 Tbsp chopped basil
  • 1 Tbsp oil
  • 1 cup marinara sauce
  • 1 package dinner rolls
  • 12 slices mozzarella cheese

Garlic Butter:

  • 4 Tbsp melted butter
  • 2 Tbsp minced garlic
  • 2 Tbsp chopped basil
  • 2 Tbsp grated parmesan

Directions:

For the sliders:

  1. Preheat the oven to 350 degrees. Cut the dinner rolls in half and set aside.
  2. In a large bowl, combine ground beef, egg, salt, pepper, garlic powder, parmesan, and chopped basil. Mix until all ingredients are well blended. Shape mixture into 12 golf ball-sized meatballs; set aside.
  3. Set a large pan to medium-high heat. Once hot, add meatballs and cook 1-2 minutes per side, then flip. (They do not need to be fully cooked at this point.) Remove meatballs to a paper-towel lined plate; drain excess fat in pan.
  4. Pour marinara sauce into the pan and place meatballs in the sauce. Cook for 8-10 minutes, flipping meatballs occasionally, until sauce has reduced to a thick consistency. Remove from heat.
  5. Place one meatball inside each halved dinner roll. Top with sliced mozzarella, then cover with dinner roll top. Place on a large baking sheet.

For the garlic butter:

  1. In a small bowl, combine butter, garlic, basil, and parmesan, stirring until evenly mixed.
  2. Pour garlic butter mixture over top of the sliders.
  3. Bake for 15-20 minutes, until the rolls are golden brown and cheese is melted.
  4. Cut into individual sandwiches, and serve.

Meatball Sliders

Keya served the sliders at a recent family gathering. The result… Next time she’ll have to make a double batch! Let us know if you try these, we’d love to hear what you think!

0
0

Grand Opening Recap

What a week it’s been for the geeks! Last Thursday we celebrated our official grand opening with a ribbon cutting and open house. It was a fantastic evening and the love and support we received overwhelmed us! We wanted to share some photos from the event and sincerely thank everyone who attended or sent their well wishes. It’s because of you… our clients, colleagues, vendors, mentors, and supporters that we’re able to do what we do. A huge thank you to the city officials, other local business owners, Lakeville Chamber members, fellow real estate professionals, and teammates from the Berkshire Hathaway HomeServices Lovejoy Real Estate offices who came out in support. We appreciate each and every one of you!

0
0

Big News of the week… Grand Opening!

Property Geeks Invitation

Two more days until our official ribbon cutting and grand opening. We’re working on the last minute details and putting the finishing touches on everything. We hope you can make it – Thursday, February 15th from 4pm to 7pm. If not, be sure to check out Thursday’s episode of #GrillTheGeeks on our Facebook page where we’ll do a little tour of the space for those of you who can’t attend.

We’re looking forward to seeing you!

0
0

We’re Having a Party!

Yes, we’re having a party… and you’re all invited!

We’re getting excited for our Grand Opening and Ribbon Cutting next week! We’ve actually been in our new office for months but between renovations and road construction, we haven’t had a chance to property welcome you all to check out our new space. We’ll be celebrating geek style which means plenty of food and lots of fun!

Everything’s happening on Thursday, February 15th. The official ribbon cutting will take place at 4pm then we’ll host an open house until 7pm. We hope you’ll be able to stop by.

0
0

Just in time for the big game… Kim’s Hot Tot Kabobs!

Property Geek Kim isn’t a native Minnesotan. But she’s been in the Twin Cities long enough to have learned a couple of things:

  1. Minnesotans love their tater tots, and…
  2. They’ll try just about anything on a stick.

So, in honor of the big game, she’s decided to share a recipe for one of her family’s new favorites:

Hot Tot Kabobs

These taters on a stick are super quick to make and will easily feed a crowd. Here’s what you’ll need:

  • Frozen Tater Tots
  • Finely Shredded Cheddar or Colby Jack Cheese
  • Bacon Bits or several strips of cooked Bacon (chopped into bits)
  • Sour Cream
  • Chives
  • Skewers

Cook the tater tots according to package directions. Once done, let them cool for a few minutes until you can touch them.

Thread tater tots onto skewers and place onto a cookie sheet.


Top the tater kabobs with bacon bits.


Sprinkle cheese over the tots.


Bake for another 5-10 minutes until cheese melts.

Transfer to a serving platter & garnish with sour cream and chives.


These Hot Tot Kabobs will be a hit just the way they are, but if you want to mix it up a bit, try the following variations:

  • Use Mexican cheese, chopped jalapenos and serve with salsa for dipping.
  • Sprinkle dry ranch seasoning over tots when cooking and serve with ranch dressing.
  • For a “healthier” slant, sprinkle chopped cooked broccoli over the tots before you add the cheese.
  • Try adding a little chili, then cheese and serve with sour cream for dipping.


We can’t promise your team will win on Sunday, but we CAN promise you’ll end up with a platter that looks like this…


What’s your favorite snack to take to a game watch party?

0
0